
Simply clone the GitHub repository.
git clone git@github.com:m3dev/octoparts.git
By default Octoparts is setup to use environment variables for much of its configuration. This is kind of annoying when running it on your development machine, so we recommend you create an application.dev.conf file where you can override some settings.
We provide a sample file at /conf/application.dev.conf.sample, so use that as a guide.
cd octoparts/conf
cp application.dev.conf.sample application.dev.conf
The simplest way to set up a development environment for Octoparts is to use Vagrant. A Vagrantfile is included in the Git repository.
We assume that you have the following installed already:
Note that the directory holding the Vagrant file is called vaygrant (with a ‘y’). This is a matter of personal choice, not a typo! :)
cd octoparts/vaygrant
vagrant up
This will set up a virtual machine and use a set of Ansible playbooks to perform the following provisioning:
The first time you run this, it will have to download the world, so it will take a long time. Go away and make a cup of coffee.
Once provisioning is complete, SSH into the machine.
vagrant ssh
The Octoparts folder is mounted at /parts, so cd to there and start the Play server.
cd /parts
./sbt run
Again, the first time this runs, it will take a long time to download dependencies.
Once the server starts, open your browser and access http://localhost:9000/admin. If all has gone well, you should see the Octoparts admin UI.
If you don’t want to use Vagrant, setting up a minimal environment by hand is pretty simple.
Octoparts requires Java 8 in order to run.
Assuming you already have Postgresl installed and running, create a Postgresql DB and user.
createuser -DRS octoparts_app
createdb -EUTF-8 -Ooctoparts_app octoparts
Don’t forget to update /conf/application.dev.conf to match whatever DB password you set.
If you want to use Memcached, just make sure it is running and then update your configuration file to tell Octoparts to use it.
caching {
  inmemory = false
}
memcached {
  host = "localhost:11211"
}
cd octoparts
./sbt run
The first time this runs, it will take a long time to download dependencies.
Once the server starts, open your browser and access http://localhost:9000/admin. If all has gone well, you should see the Octoparts admin UI.
Let’s register an endpoint using the admin UI. For our sample endpoint we’ll use http://jsontest.com’s JSON echo API.
First we need to create a thread pool. This pool will be used to execute all HTTP requests to our endpoint.
Click 'Thread pools’ in the navbar, then click the 'Create a new thread pool’ button. Give your thread pool a name and press 'Submit’.
Next, click 'Create a new part’ in the navbar and fill in the form as shown in the screenshot below. (Any fields not shown in the screenshot can be left blank.)
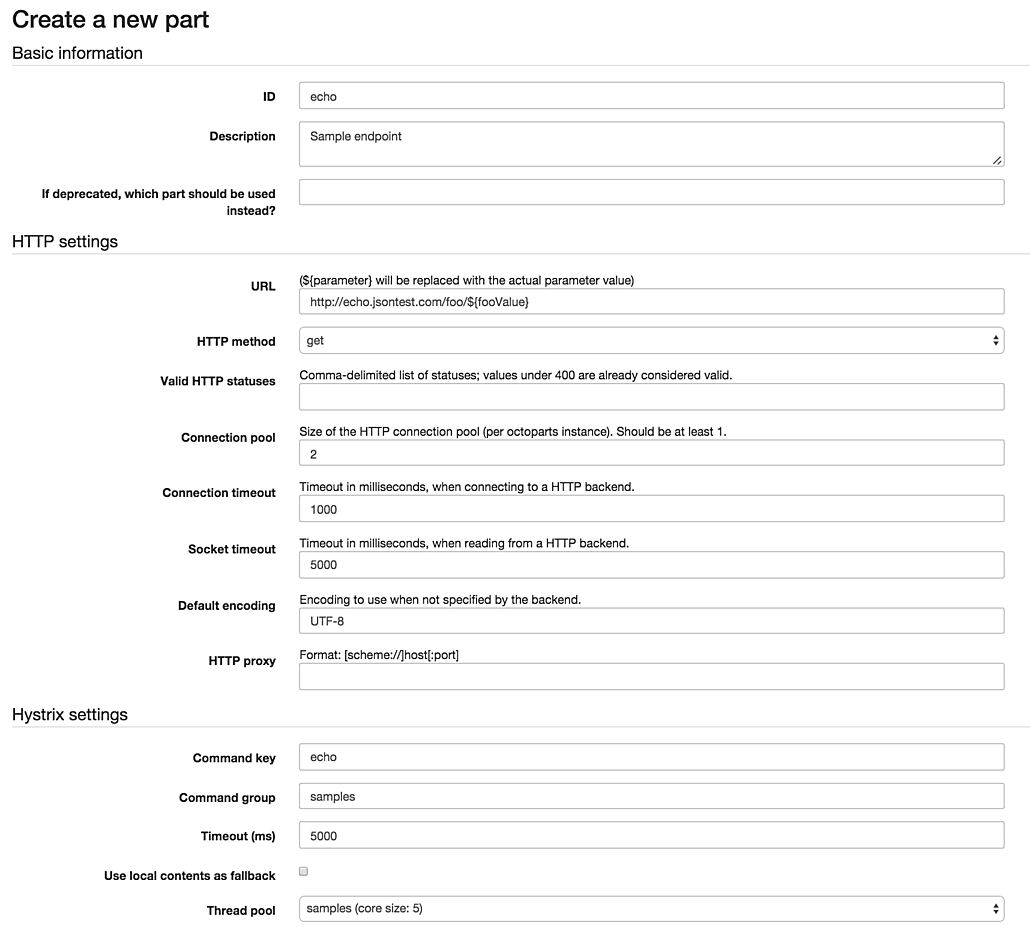
Note the endpoint’s URL: http://echo.jsontest.com/foo/${fooValue}. The ${fooValue} is a placeholder that can be substituted with a client-supplied value when the endpoint is called.
Now we’ll register a parameter so that we can dynamically change the value of this placeholder.
On the endpoint’s detail page, click the Create a new parameter button and fill in the form as shown in the following screenshot.
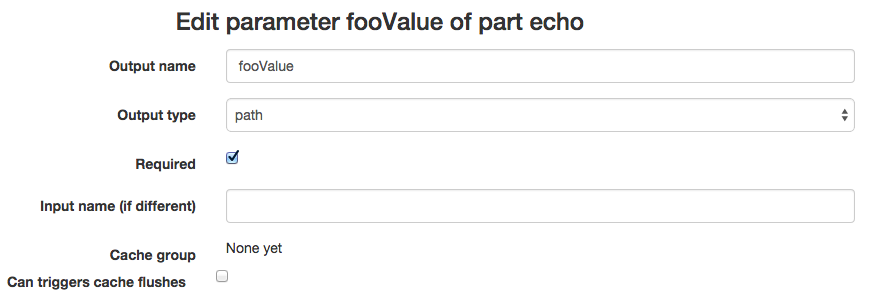
Note that we set the parameter’s type to path, because we want to insert the parameter’s value into the endpoint’s URL. Parameter values can also be passed as URL query parameters, headers, cookies, etc.
Now we’re ready to try our new endpoint! On the endpoint’s detail page, click the 'Try it!’ button.
Fill in a value for the fooValue parameter and click the 'Send’ button.
If all went well, you should see a JSON response that looks something like this:
{
    "responseMeta": {
        "id": "tryIt-1409293933838",
        "processTime": 235
    },
    "responses": [
        {
            "partId": "echo",
            "id": "echo",
            "cookies": [],
            "statusCode": 200,
            "mimeType": "application/json",
            "charset": "ISO-8859-1",
            "cacheControl": {
                "noCache": false
            },
            "contents": "{\"foo\": \"bar\"}\n",
            "errors": [],
            "retrievedFromCache": false
        }
    ]
}
Congratulations, you’ve successfully created and tested your first endpoint!
If you used Vagrant to install, you can instantly check out various services related to the endpoint you just made.
Next: Read about Octoparts’ HTTP API